In my previous post, we dived into the intriguing world of Blazor WebAssembly (WASM) and how it’s revolutionizing web development by enabling developers to run C# code in the browser. Today, we’ll further explore this topic by breaking down the default Blazor WASM template provided by Microsoft, piece by piece.
What’s in the Box
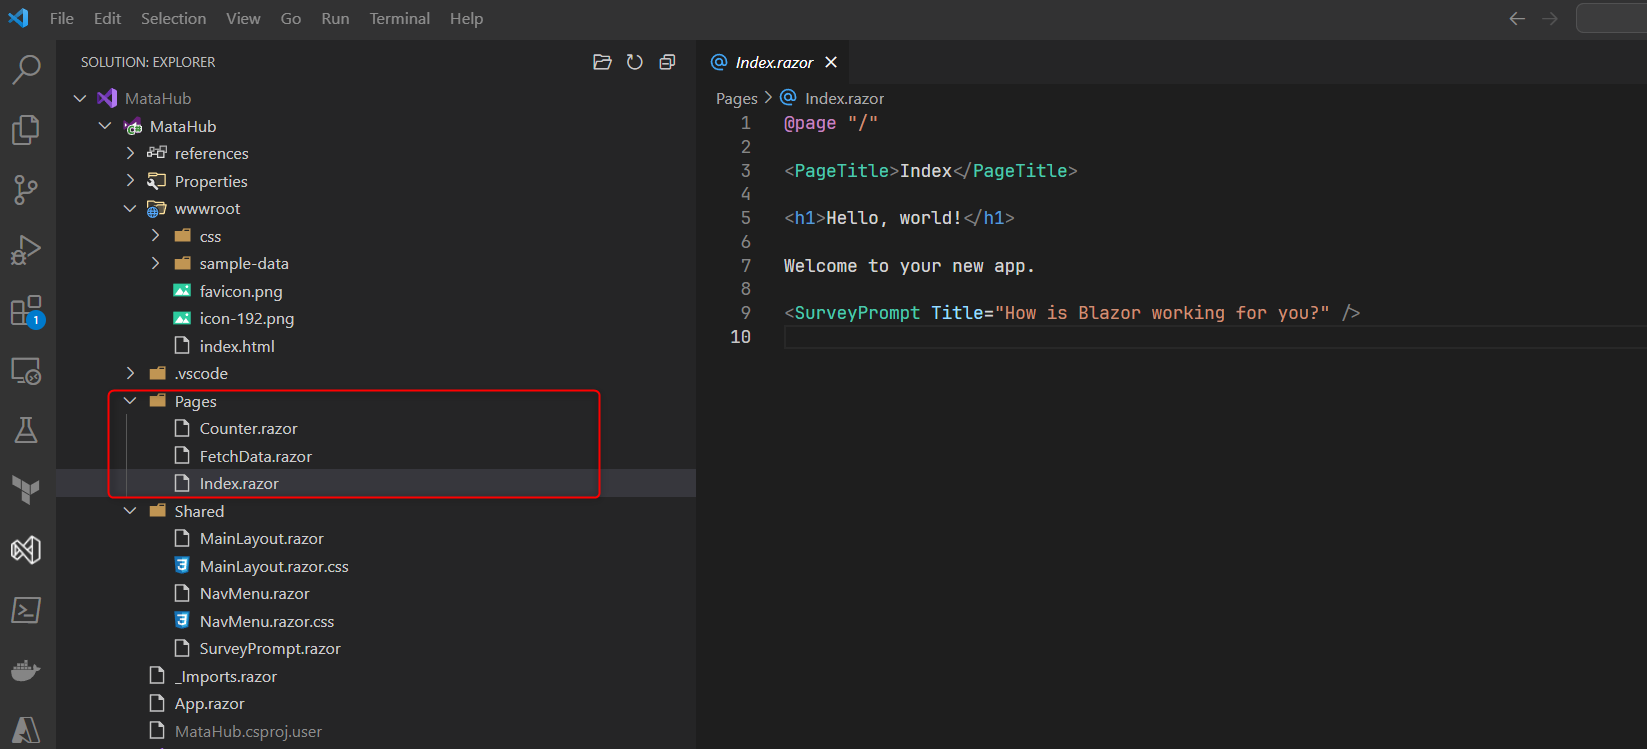
After creating a Blazor WASM project, an initial project is set up with the following files and folders:

wwwroot Folder:
The `wwwroot` directory holds all our application’s static assets. This encompasses items like stylesheets, images, the favicon, and notably the `index.html` file, which serves as the primary entry point for the application.

App.razor:
This file defines the app’s routing. The component uses the project’s pages to navigate. The router component is in charge of intercepting the browser navigation, and directing it to the right page of our application. It also holds the main layout of the application.

Pages folder:
The “Pages” folder houses all the components and pages in our application that can be navigated to via routes. By default, this folder includes files such as `Index.razor`, `Counter.razor`, and `FetchData.razor`. Each of these files corresponds to a unique navigation route in our menu.
The navigation is specified by the @page directive

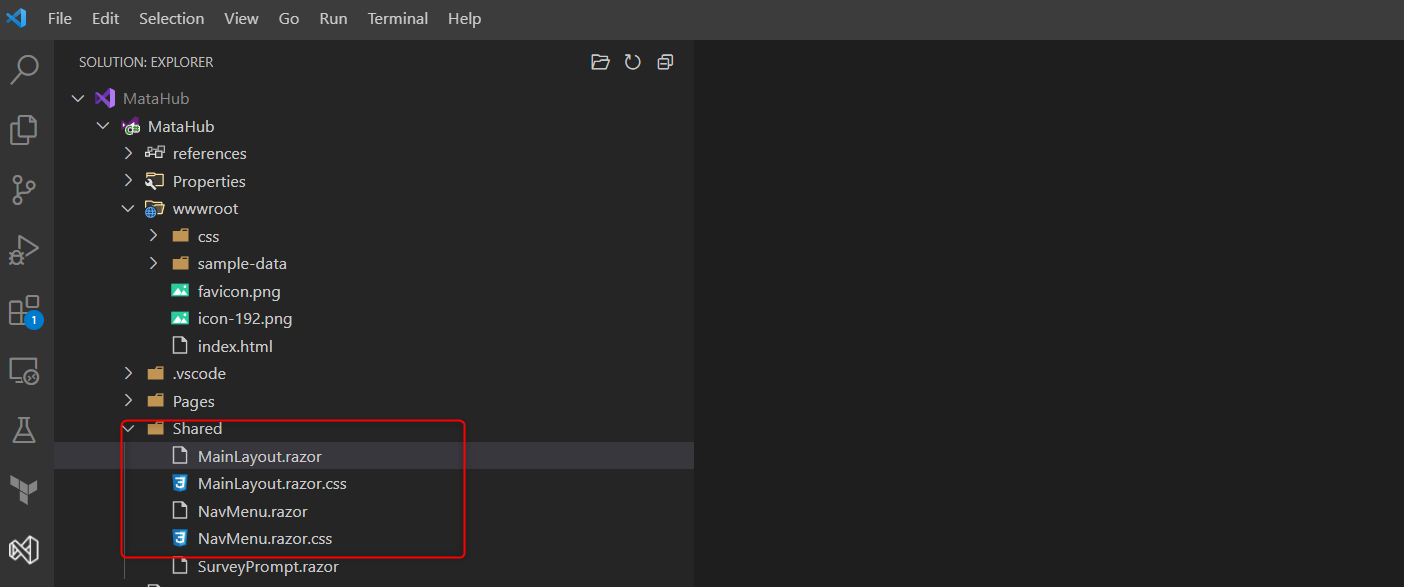
Shared folder:
This folder contains code that is shared between all your pages.

Program.cs file:
This file contains the main entry point for your Blazor application, and also where services needed by the application can be registered.

Other files generated are more IDE specific which helps run the application.
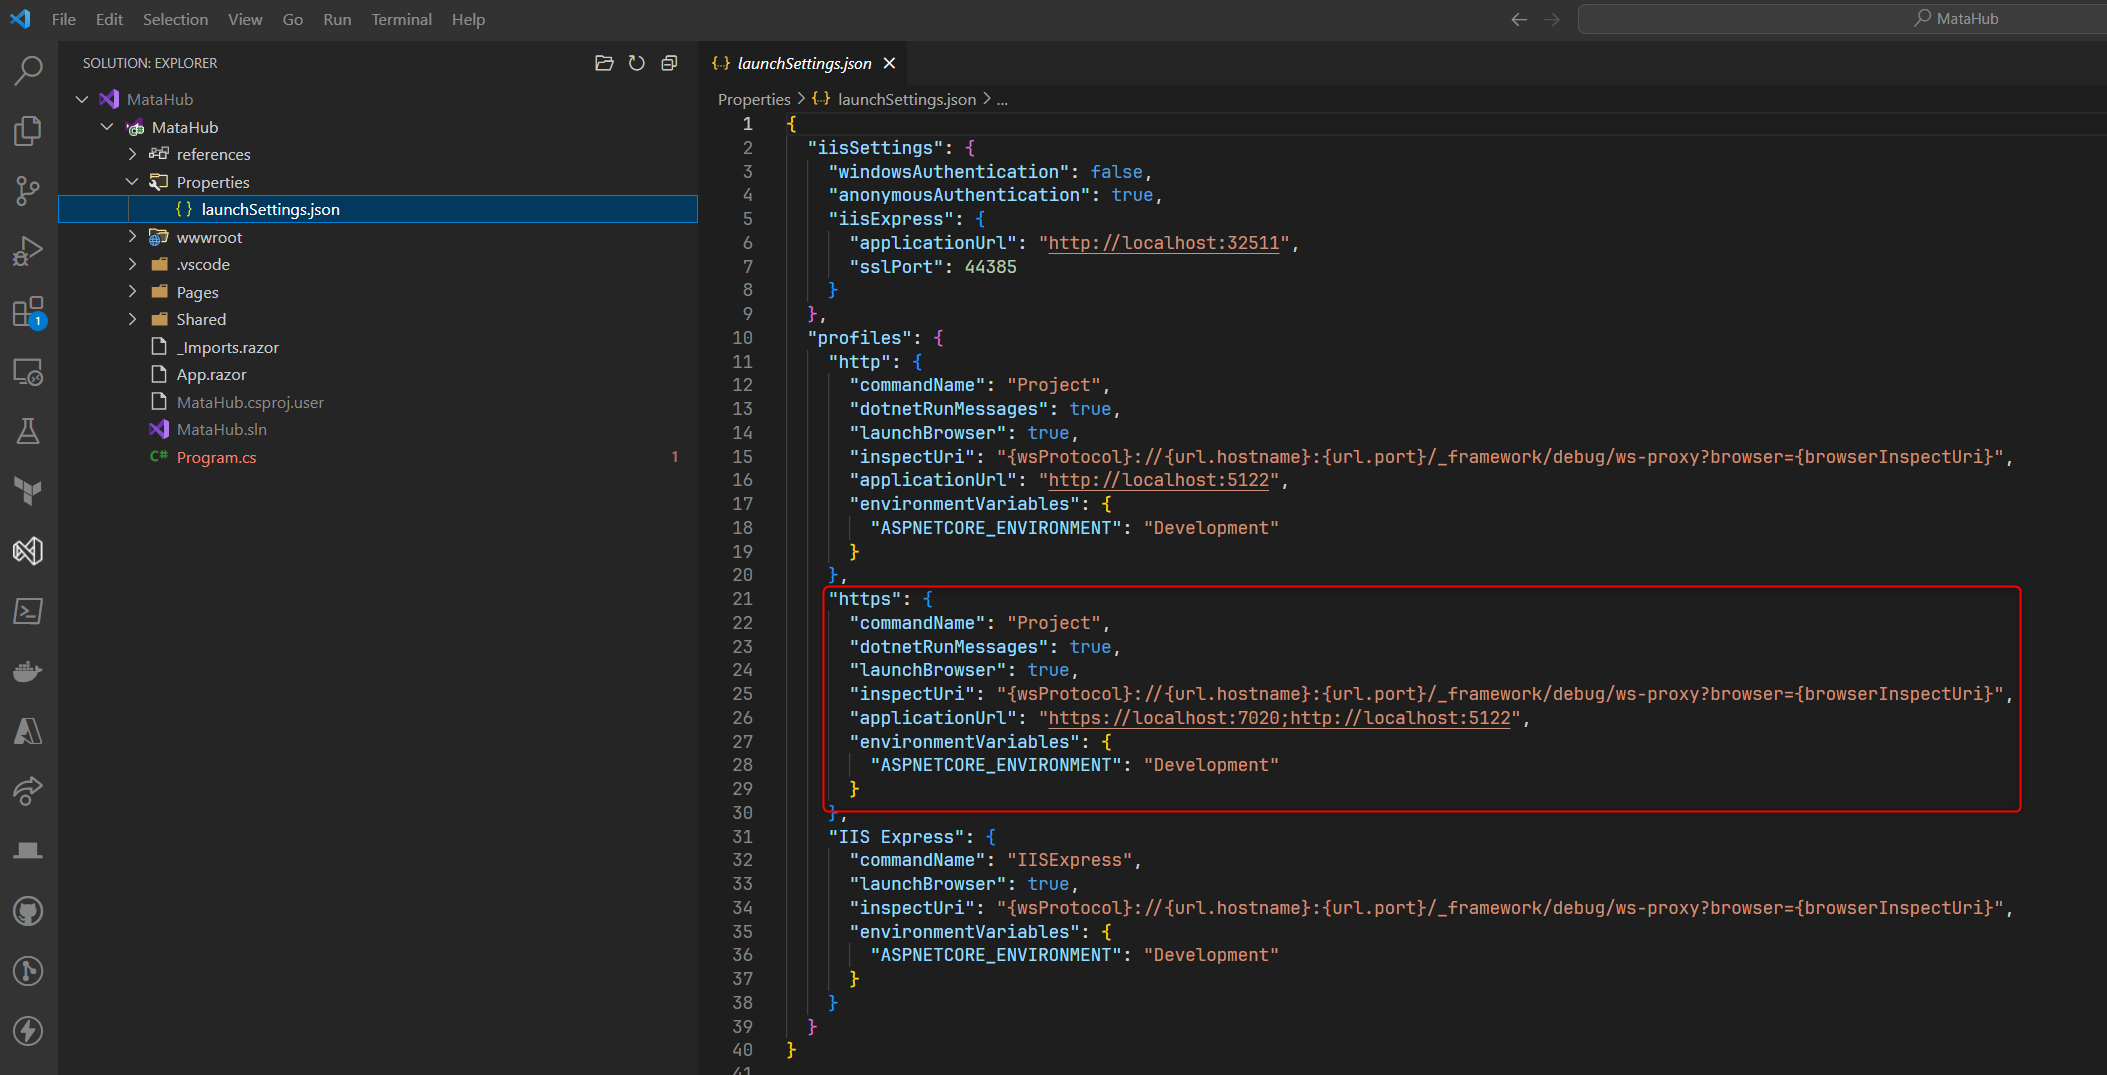
The launchSettings.json file, located inside the Properties folder helps the IDE to determine which debugging profiles can be used to run the application.

Each profile configures the settings for launching the application. The highlighted HTTPS profile has the following properties.
The commandName property specifies the command that should be used to launch the application. In this case, the command is Project.
The dotnetRunMessages property specifies whether or not to show debug messages in the console when the application is launched.
The launchBrowser property specifies whether or not to automatically launch a browser when the application is launched.
The inspectUri property specifies the URI that can be used to connect to the application’s debugger.
The applicationUrl property specifies the URLs that the application should listen on. In this case, the application will listen on https://localhost:7020 and http://localhost:5122.
The environmentVariables property specifies the environment variables that should be set when the application is launched.
In this case, the ASPNETCORE_ENVIRONMENT environment variable is set to Development. There is also a _Imports.razor which defines common Razor directives as @using directive to include our dependencies. The generated Blazor WASM template provides a good starting point for building your own Blazor WASM applications. However, you may need to add additional features or functionality to your application. You can find more information about Blazor WASM in the Blazor documentation: https://docs.microsoft.com/en-us/aspnet/core/blazor.
Here are some of the features that are included in the generated Blazor WASM template:
A basic UI with a navigation bar and a few pages.
A .NET Standard library that contains helper classes and functions.
A NuGet package that includes the necessary dependencies for Blazor WASM.
The template also includes some best practices for developing Blazor WASM applications, such as:
Using the .NET Standard library for shared code.
Using NuGet packages to manage dependencies.
Following the Blazor coding conventions.
I hope this blog post has helped you get started with the generated Blazor WASM template. If you have any questions, please leave a comment below.
